How to series: Learn how to perform a basic spirometry test

In the world of diagnostics, pulmonary function testing is one of the most under-utilized tools. Long considered the realm of lung specialists with mysterious and complicated equipment, completing even the most basic pulmonary function testing (PFT) requires a referral to elsewhere, necessitating extra planning and time for patients. This is not only an extra burden on patients but increases the risk of delayed care, as PFT labs are often backlogged due to the ongoing COVID-19 pandemic. Or, people simply decide they don’t want to visit yet another provider.
However, setting up a PFT program is wellwithin the scope of virtually any office, from independent internal and family medicine practices and concierge clinics to primary care practices that are part of larger organizations. Offering PFT services can make any practice a truly patient-centered ‘home’ for medical care, and considering the revenue potential, PFT at the point of care makes financial sense, too. And while it’s always helpful to have a specialist (like a respiratory therapist) available for additional added value, existing staff can easily be trained to provide basic (yet still incredibly valuable) PFT services like spirometry.
Before you start a spirometry test #
So, let’s say your practice has made the decision to add spirometry to your list of provided services, and your team is ready to test their first patient. There are a few things that are important to check before getting started withanyspirometry test (whether it’s the first patient or the thousandth).1
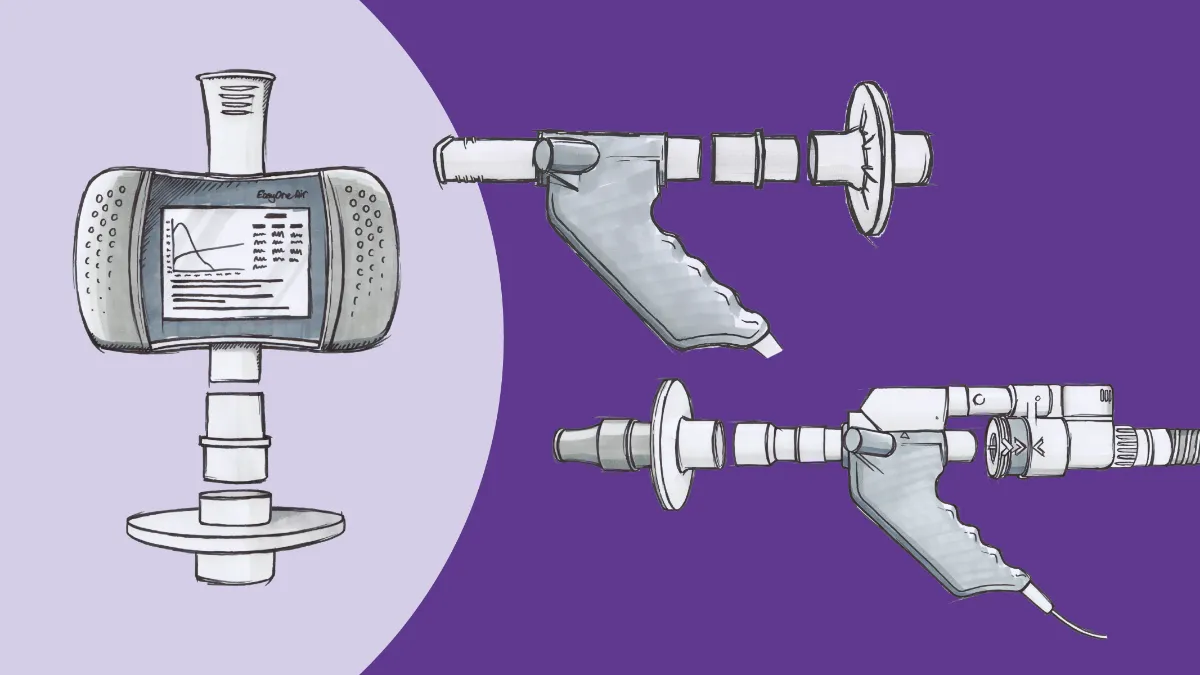
- Equipment: This might seem like a no-brainer, but that’s what makes it so easy to forget. One of the first rules of spirometry interpretation is GIGO (garbage in, garbage out); if the data is inaccurate, the interpretation will be as well. Usually, we talk about this in reference to things like coaching and technique, but if your equipment isn’t in good working order, the data will be unreliable no matter how well you prompt your test subject. In most cases, equipment prep starts with validating the device’s calibration. Using a large syringe (with either a 1 liter or 3 liter capacity, depending on the particular machine), the user forces air past the sensor during a particular time window. The detected volume is then checked against the known volume of the syringe, and if the measurement is within a certain deviation, the machine passes its calibration check. If the measurement is outside the acceptable range, it may need to be updated and retested, or even serviced by the manufacturer. Some devices, such as the ndd EasyOne Air, use technology that doesn’t require regular mechanical calibration, although periodically checking even these devices with a ‘biological control’ (i.e., a healthy clinic employee) is still considered optimal practice.
- Data: Once again, this is an area where GIGO rules. Spirometry interpretation is based on standards predicted by anthropometric values, including age, height, and biological sex. If your patient information is inaccurate, the preliminary interpretation provided by the machine can be skewed, providing false negatives (or positives, depending on the nature of the error). To ensure diagnostic accuracy, take a moment to double-check all information entered into your testing equipment, including patient identifiers. The current temperature and barometric pressure should also be entered, as these can have some impact on readings. However, be sure to check the operations manual for the equipment in use, as some machines are able to make these measurements directly (and some, such as the EasyOne Air, are unaffected by pressure changes).
- Patient: The existence of contraindications for spirometry has been a matter of some debate. Prior to 2019, very recent history of myocardial infarction (MI) was considered an absolute contraindication, as the forceful efforts involved in a proper forced exhalation maneuver can potentially cause rapid changes in intrathoracic pressure, and therefore blood pressure. However, the latest technical recommendations from the American Thoracic Society (ATS) and European Respiratory Society (ERS) have moved recent MI contraindications into the ‘relative’ category, allowing clinicians to use their best judgement2. Similar conditions susceptible to these changes in intrathoracic (or intraabdominal) pressure, like recent surgeries or uncontrolled hypertension, should also be considered before going through with spirometry. Other relative contraindications are considered because they may have an impact on technique or effort, and therefore may once again affect the accuracy of collected data. These include events ranging from recent surgery and pain to having eaten a large meal (as the maneuver can induce nausea) or wearing confining clothing (which can affect chest wall motion). The subject needs to be able to understand and comply with instructions, as well. In many cases, patients will also be asked to abstain from their inhaled medications for time frames aligning to their duration of action (e.g., 12-24 hours for a twice-daily medication), although this is most critical when preparing for a post-bronchodilator study to evaluate the reversibility of airflow obstruction. However, in all cases, patients should avoid ingesting other substances that can affect coordination (like alcohol) or degree of bronchospasm (like tobacco or e-cig products), and any medication or substance that is taken should be documented in the record to provide context.
On the starting line #
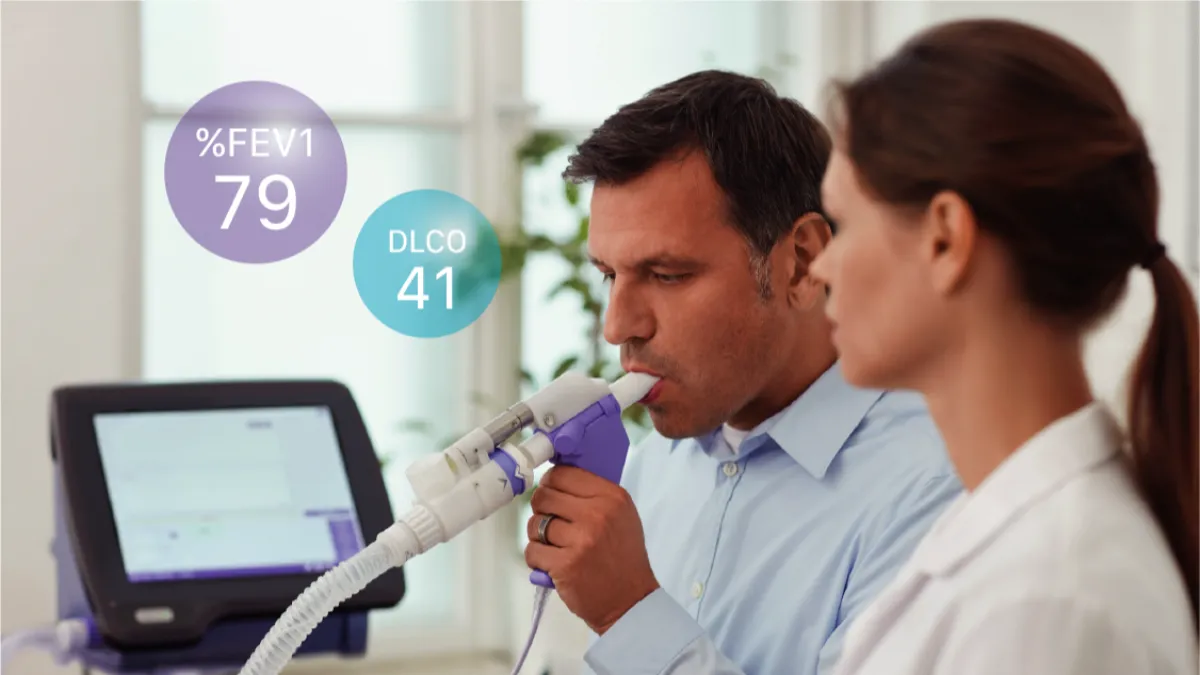
Once your equipment and patient have passed all these checkpoints, it’s time to see how well the air is moving in your patient’s lungs. Once again, there are a few critical details to remember in order to maximize the accuracy of the test (and therefore the diagnosis). Missing any one of these can lead to suboptimal data acquisition; fortunately, each one is relatively easy to notice and correct.
- Positioning: Diagnostic spirometry is best performed in a seated position.3 Interestingly, guidance documents for the National Health and Nutrition Examination Survey (NHANES), a study used to create a common spirometry predicted-value set, asks that all participants perform spirometry standing. 4However, other studies (including the ATS/ERS guidelines) have demonstrated that as long as subjects sit fully upright, pulmonary dynamics are the same when standing, and sitting has the benefit of additional safety should the subject become lightheaded or dizzy. The subject’s feet should be flat on the floor, minimizing the load on abdominal muscles and making it easier to ‘bear down’ and give a truly maximal exhalation effort. Finally, the subject’s chin should be slightly elevated, in order to open the airway as much as possible (other than the nares, which should ideally be blocked with plugs or clips).
- Infection control: This has always been a concern (or at least, should have been), but in the COVID-19 era, it is even more so. All patients should be masked as much as possible (right up until the start of testing), and good hand hygiene practices should always be followed. Appropriate filters should be attached to the spirometer, and tissues should be made available to help manage coughing and sputum production. All equipment and surfaces that come into contact with the patient (or their breath) should be wiped down or otherwise cleaned according to manufacturer’s instructions or organizational policy.
- Instruction: With technique and effort being so critical to reliable results, the clinician’s ability to instruct and motivate the subject is essential. Prior to starting the test, the clinician should explain each step of the procedure, as well as provide a brief demonstration. It’s always a good idea to have your test subject as prepared as possible ahead of the first effort, in order to maximize the chances of getting acceptable and reproducible results in the fewest number of attempts.
Spirometry testing, testing #
Now, the moment of truth! The stage is set, and it’s time to actually perform the test. The heart of spirometry is a forced maneuver to obtain the forced vital capacity (FVC) and the forced expiratory volume in the 1st second (FEV1) , which the ATS/ERS document breaks down into four discrete parts:2
- Maximal inhalation
- A forced “blast” of exhalation
- Prolonged exhalation (at least six seconds, no longer than 15 seconds)
- Another maximal inhalation
Each of these parts will likely feel strange and uncomfortable to someone who has never done spirometry before, as they are very different than how humans normally breathe. That’s why coaching and encouragement is so important. Some testers allow the patient to perform tidal breathing before maximal inhalation, some coach maximal inhalation just before inserting the mouthpiece. In my practice, I tend to do the latter; I tell the patient they need to fill their lungs as big and deep as they can, then I watch to ensure they place the mouthpiece between their lips and over their tongue before instructing them to blow out. I reiterate the importance of a tight seal with the lips throughout the entire maneuver so that no leakage of air occurs.
The blast can be one of the most disconcerting phases, especially for people who already have symptoms of respiratory compromise. It can frequently provoke a cough, spoiling the maneuver and causing discomfort. However, in order to properly read the forced expiratory volume in 1 second (FEV1), a key spirometry measurement, maximal effort is essential. Similarly, prolonging exhalation beyond the point where the subject feels ‘done’ can be awkward and uncomfortable, but is essential to measuring the FVC. Once again, this is where the engagement and motivation of the clinician is vital. By being the subject’s cheerleader and encouraging them to “go, go, go” and “keep blowing, keep blowing,” the chances of completing an acceptable test increases dramatically. And finally, by keeping an eye on the system’s feedback, you can accurately terminate the test by having the subject inhale to maximum once again, completing the flow-volume loop and enabling evaluation for upper-airway dysfunction.
End of the line #
Once the first acceptable effort is complete, both the clinician and the subject have a better idea of what to expect from further efforts. Based on feedback from the spirometer (in addition to their own observations and expertise), the clinician can re-instruct on certain parts of the maneuver and reinforce the parts that went well. For their part, the subject now knows what to expect and can adapt their own technique to better fit the instructions, as well as report any adverse effects that might put a stop to the test, such as pain or dizziness. Clinician, subject, and machine all learning to work together as quickly as possible is important because the more efforts that are performed poorly or near-properly, the more fatigued the subject can get due to the strain. Seven to eight is generally considered the upper limit on number of efforts, as additional pushes may be inconsistent or submaximal. When testing kids, additional efforts may be acceptable as long as FEV1 doesn’t decline by more than 20%.2 The lower limit of tests is three, as it requires three tests where the FEV1s and FVCs are within 5% or 150 milliliters of their corresponding measures to be considered reproducible. As soon as those are measured, the spirometer should report acceptability and reproducibility, and advise the clinician to end the testing. In those cases where maximum attempts are reached or testing ends early due to adverse effect (or the patient refuses further efforts), some information may still be obtained based on the judgement of the testing clinician. All data should still be reported, but with appropriate caveats.
Finally, depending on the results from the first series of tests (and the type of test ordered), a bronchodilator responsiveness test may be in order. However, that essentially just consists of administration of a short-acting bronchodilator (generally some form of albuterol), a pause to allow onset, and another series of spirometry efforts to look for any changes in FEV1 and FVC. If there is no need to do further testing, evaluate the patient to make sure they tolerated the procedure, and complete any administrative efforts (data entry, printing, etc.). That’s it! You have now successfully completed a spirometry test, and it is ready to be interpreted as indicated by your organizations’ policies.
Easy to practice #
Legendary computer game developer (and founder of Chuck E. Cheese restaurants) Nolan Bushnell once said, “The best games should be easy to learn, but difficult to master.”5 Spirometry may not be a game, but it follows a very similar principle. It can take some time to become fully proficient with the concepts and maneuvers involved, but they are relatively simple and easy to practice. All it takes is motivation, a willingness to cheer on your patients, and an eye for detail.
Moore VC. Spirometry: Step by step. Breathe. 2012;8(3):233-240. doi:10.1183/20734735.0021711 ↩︎
Graham BL, Steenbruggen I, Barjaktarevic IZ, et al. Standardization of spirometry 2019 update an official American Thoracic Society and European Respiratory Society technical statement. Am J Respir Crit Care Med. 2019;200(8):E70-E88. doi:10.1164/rccm.201908-1590ST ↩︎ ↩︎ ↩︎
Moore VC. Spirometry: Step by step. Breathe. 2012;8(3):233-240. doi:10.1183/20734735.0021711 Graham BL, Steenbruggen I, Barjaktarevic IZ, et al. Standardization of spirometry 2019 update an official American Thoracic Society and European Respiratory Society technical statement. Am J Respir Crit Care Med. 2019;200(8):E70-E88. doi:10.1164/rccm.201908-1590ST ↩︎
Centers for Disease Control and Prevention (CDC). Respiratory Health Spirometry Procedures Manual. NHANES Man. 2008;1(January):http://www.cdc.gov/nchs/data/nhanes/nhanes_07_08/b. ↩︎
Bushnell’s Theorem: Easy to Learn, Difficult to Master. Wolfshead Online http://www.wolfsheadonline.com/bushnells-theorem-easy-to-learn-difficult-to-master/#8db01. Accessed February 11, 2021. ↩︎