FAQ
Which EHR vendors can ndd integrate with?
ndd can integrate with any EHR vendor that can support a bi-directional HL7 orders/results lab interface.
What kind of integration options does ndd offer?
ndd offers a file-based integration utilizing an SFTP or network-based location for file communication with an EHR vendor. HL7 is the standard data structure that ndd utilizes but can support other data formats as well. The use of other interface engines can be utilized to complete an integration project.
What is the process for integrating your software with our existing systems?
The first step for an integration project is to complete the EMR integration request form here: https://nddmed.com/f/emr. An integration specialist will then reach out to you with the next steps.
How long does the integration process typically take?
Duration depends on the IT team of the facility. The ndd side of the integration process can be completed within a few hours for standard integrations. EasyOne Connect software is simply configured to point to the SFTP or network-based location where files are being placed.
How does ndd ensure that data is securely transferred during integration?
EasyOne Connect software utilizes AES 256 encryption. SFTP has its own security protocols built into it. If a network-based location is utilized, it will follow the protocols of the facility.
Can patient data and test results be accessed across multiple laptops and desktops within a clinic?
Yes, EasyOne Connect offers an optional centralized patient database feature, enabling seamless access to patient orders and results across all instances of the software, irrespective of physical location. Customers can leverage their on-premise SQL servers or MS Azure environments to ensure data accessibility and consistency.
Does ndd offer user management within the software?
EasyOne Connect provides flexible options for managing users and their access. User accounts can be created and managed directly within EasyOne Connect for simple permission control. For more advanced management, the software supports integration with Active Directory for using your existing directory service accounts, groups, and permissions. EasyOne Connect also supports optional single sign-on (SSO) capability. If you would like to review the Active Directory Application Note, please contact [email protected].
Can ndd provide examples of successful integration with other clients?
ndd has integrated with all major vendors and can provide examples of successful integrations with various healthcare providers and organizations. You can contact our integration department via email at [email protected] for more information.
How does ndd handle updates and maintenance to the integration?
ndd does not handle the maintenance and upgrades as the software is installed locally on the client’s machine. We do, however, offer a silent installer package that our support team can assist you with. This silent installer can be executed via a script through active directory commands depending on your facility. It is the responsibility of the facility to implement any future updates. There is no licensing fee associated with the software and/or the updates.
Are there any additional costs associated with integration?
ndd does not charge for standard integration. In the event custom development is needed, ndd will provide a statement of work before a project begins. Almost all EHR vendors will charge a fee that the client is responsible for.
What are the HL7 specifications?
HL7 specifications can be found here.
What are the database options?
- Local SQLite file-based database.
- On-premise Microsoft SQL Server database.
- Azure cloud-hosted Microsoft SQL Server database.
Please see the application note for additional information.
Who is responsible for setting up and hosting the SFTP and/or network-based location?
The facility is responsible for setting up and hosting either option. ndd requires a username and password if using an SFTP environment.
What results are received in the HL7 message?
The result HL7 message will consist of a combination of discrete results and an embedded base64 PDF attachment for the PFT report. If you prefer, we also offer the option of including a reference link instead of the embedded PDF.
Is a server required?
No, a server is not required.
What kind of support does ndd offer during and after the integration process?
You can schedule a meeting with an integration engineer from 8 a.m. to 5 p.m. ET Monday through Friday. ndd can accommodate meetings outside of that timeframe if planned accordingly. The integration team can be reached via email at [email protected]. The support team can also be reached via email at [email protected] or by phone at (978) 470-0923.
What is the difference between the EasyOne Pro and Pro LAB?
The EasyOne Pro LAB is exactly the same as the EasyOne Pro, except that it has the capability to perform the multi-breath washout (MBW) test. This test requires additional sensors and the use of 100% Oxygen.
Can I reuse the Spirette mouthpiece?
The Spirette mouthpieces are single-use only and disposable.
Can I wash/disinfect the Spirette mouthpiece?
To avoid cross contamination the Spirette mouthpiece is recommended to be used only once. Washing / disinfection of the Spirette mouthpiece might damage sensitive parts, which may compromise the test results and the safe avoidance of cross contamination.
Can I use any breathing tube on the market for testing, as long as it fits into the sensor?
As a crucial component of the TrueFlow technology, the measurement accuracy is also ensured by the ndd Spirettes/EasyOne FlowTubes, which are precision-manufactured and undergo stringent quality inspections. Therefore we highly recommend using the original ndd Spirette/EasyOne FlowTube to fully benefit from the TrueFlow technology.
How do I connect a filter to the EasyOne Pro/LAB?
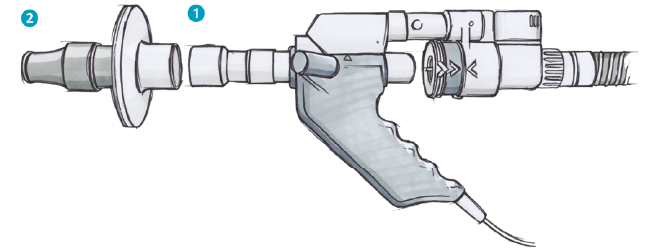
To add a filter (2) to the EasyOne Pro, insert the (1) Spirette FA Pro/LAB into the EasyOne Pro handle. Then attach the filter to the Spirette FA Pro/LAB, as shown in the diagram below. If you have questions about how to connect or use ndd filters, please contact ndd customer support in North America at [email protected] and internationally at [email protected].
Can I reuse the EasyOne FlowTube mouthpiece?
The ndd EasyOne FlowTube mouthpiece is a single-patient use product.
Can I wash/disinfect the EasyOne FlowTube mouthpiece?
To avoid cross contamination, we recommend using ndd’s FlowTube only once. Washing / disinfecting the EasyOne FlowTube mouthpiece might damage sensitive parts, which may compromise test results and safe avoidance of cross contamination.
Can I use any breathing tube on the market for testing, as long as it fits into the sensor?
As a crucial component of the TrueFlow technology, the measurement accuracy is also ensured by the ndd EasyOne FlowTube, which is precision-manufactured and undergoes stringent quality inspections. Therefore we highly recommend using the original ndd EasyOne FlowTube to fully benefit from the TrueFlow technology.
What ndd products is the EasyOne Filter compatible with?
The EasyOne Filter FT is compatible with the FlowTube for EasyOne Air and EasyOne Sky. The EasyOne Filter SP is compatible with the Spirette for Easy on-PC.
Can I reuse the EasyOne Filter?
No, the ndd EasyOne Filter is a single-patient use product.
How do you attach the EasyOne Filter FT?
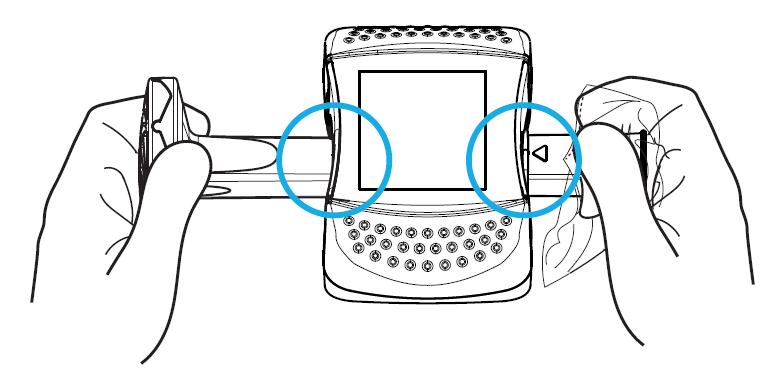
Leave the wrapper of the ndd FlowTube wrapped around the mouthpiece (see image) to insert the FlowTube into your EasyOne Air. Then, with the wrapper still in place, attach the EasyOne Filter FT to the FlowTube. Ensure that the FlowTube and the EasyOne Filter FTare fully inserted. The EasyOne Filter FT is to be used only with the EasyOne Air. You can watch the instructional video here.
How do you attach the EasyOne Filter SP?
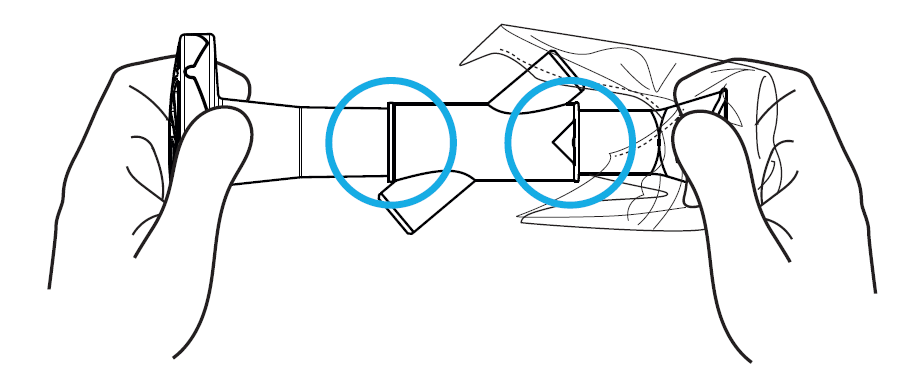
Leave the wrapper of the ndd Spirette wrapped around the mouthpiece (see image) to insert the Spirette into your Easy on-PC. Then, with the wrapper still in place, attach the EasyOne Filter SP to the Spirette. Ensure that the Spirette and the EasyOne Filter SPare fully inserted. The EasyOne Filter SP is to be used only with the Easy on-PC. You can watch the instructional video here.
Is the EasyOne Filter compatible with other PFT devices?
No, the EasyOne Filter is compatible with the ndd EasyOne Air, EasyOne Sky and Easy on-PC spirometers.
Which software is compatible with the EasyOne Filter?
You can find the compatible software here. Please note that when using the ndd EasyOne Filter, you must set the use of a filter as default for performing tests and calibration checks. You must also confirm the use of a filter before every test and calibration check. The compatible firmware/software is optimally tailored for use with the EasyOne Filter.
Why is the EasyOne Filter placed at the end of the ndd mouthpiece?
The ndd EasyOne Filter is placed at the end of the breathing mouthpiece to minimize resistance and dead space in order to ensure optimal spirometry accuracy.
Do I need a filter to avoid cross-contamination?
ndd breathing mouthpieces (Spirette and FlowTube) are designed to prioritize hygiene and the safe reuse of ndd devices by avoiding cross-contamination among patients. The EasyOne Filter helps to keep the ambient environment clean for technicians and other patients (transmission from patient to patient by sharing a device).
Can I reuse the DLCO Barriettes?
ndd’s DLCO Barriettes are single-patient use to prevent cross-contamination between patients.
Can I wash/disinfect the DLCO Barriettes?
The DLCO Barriettes are single-patient use disposables and are not designed to endure washing or disinfection cycles. Washing/disinfection of the Barriette may damage sensitive parts, which compromise the test results and break the hygiene concept of the EasyOne Pro / LAB systems, which is designed to reduce cleaning to an absolute minimum.
Can I reuse the FRC Barriettes?
ndd’s FRC Barriettes are single-patient use to prevent cross-contamination between patients.
Can I wash/disinfect the FRC Barriettes?
The FRC Barriettes are single-patient use disposables and are not designed to endure washing or disinfection cycles. Washing/disinfection of the FRC Barriette may damage sensitive parts, which compromise the test results and break the hygiene concept of the EasyOne Pro LAB system, which is designed to reduce cleaning to an absolute minimum.
Who can I contact for the installation of the replacement components?
- Support USA and Canada: +1 877 904 0090 or [email protected]
- Support international: Please contact your local distribution partner or contact support at [email protected].
Where can I buy the annual replacement kit?
The annual replacement parts kit is available to purchase from your authorized ndd dealer or the ndd service department.
- North America - [email protected]
- International - [email protected]
How do I replace the affected parts on the EasyOne Pro/LAB?
You can find detailed instructions on how to install the annual replacement kit in the EasyOne Pro/LAB manual, chapter 10.2.
How to connect a filter to the EasyOne Pro/LAB
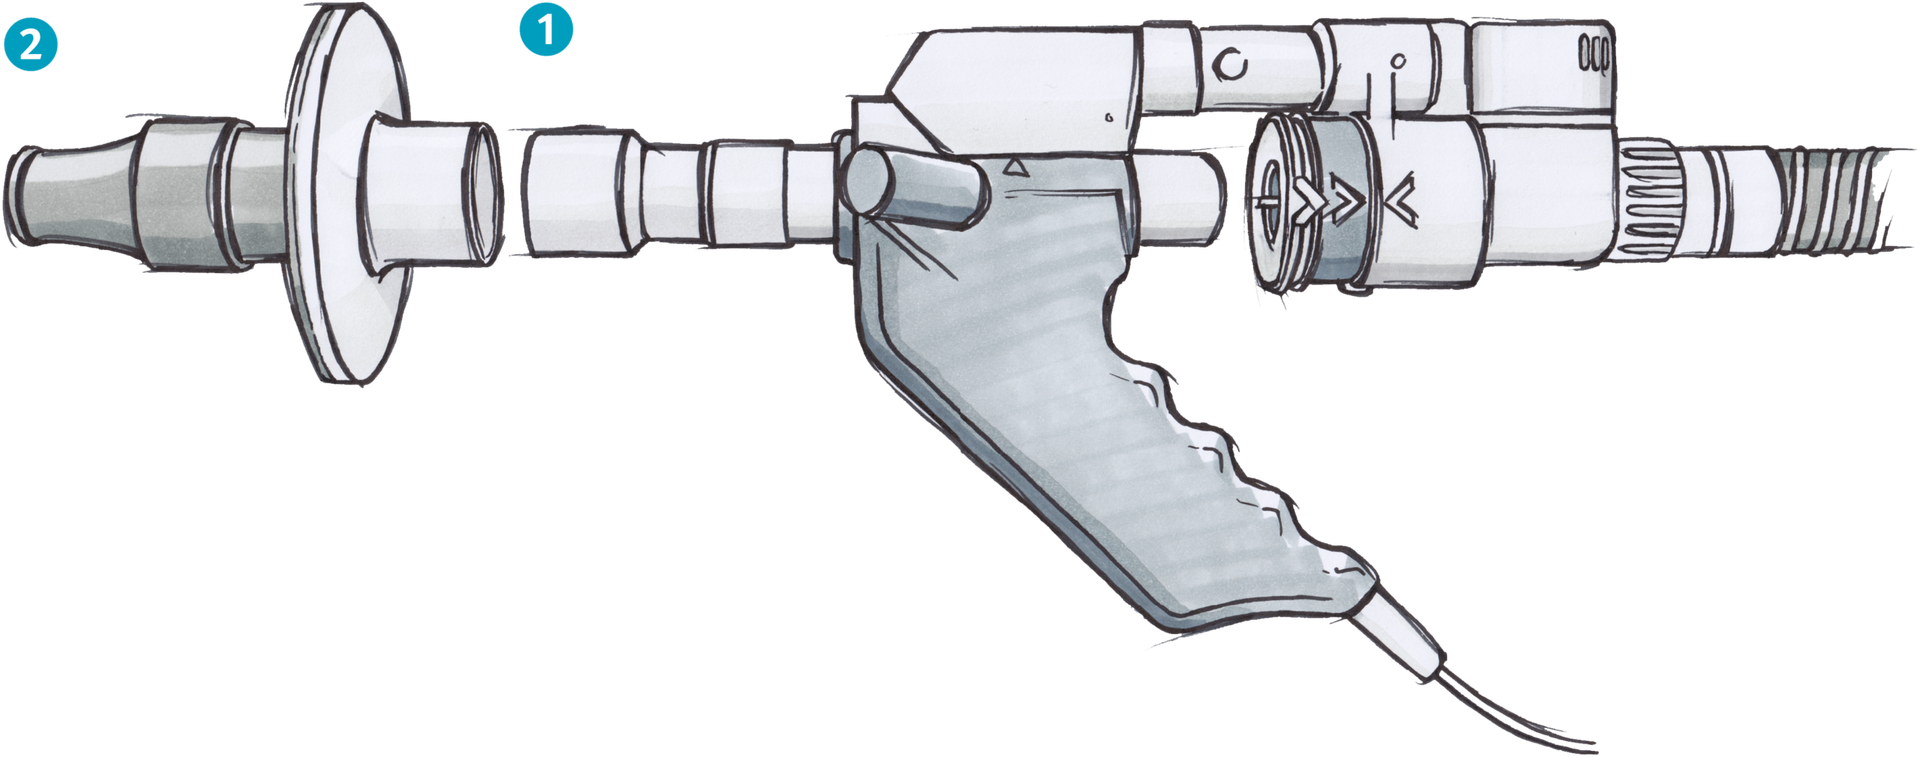
To add a filter (2) to the EasyOne Pro, insert the (1) Spirette FA Pro/LAB into the EasyOne Pro handle. Then attach the filter to the Spirette FA Pro/LAB, as shown in the diagram below. If you have questions about how to connect or use ndd filters, please contact ndd customer support in North America at [email protected] and internationally at [email protected].
Is one ndd device better than the others for integrating with an EMR?
All current generation ndd devices, EasyOne Air, Easy on-PC and EasyOne Pro/LAB V5, are equally capable of integrating with your EMR.
Which predicted or normal values are supported?
You can find the product specification on the respective product pages. The specification contains a list of all supported normal values.
To get more detailed information about the supported parameters, age range, ethnicities and height range of each supported predicted set, please click here.
How do you derive DLadj (DLCO adjustment)?
The DLCO value can be adjusted for hemoglobin, altitude and the COHb concentration and CO back pressure.
Click here to find more information about the formulas used to derive DLadj.
How can I perform Phase-III Slope Analysis including Scond and Sacin?
Our research software WBreath can be used to perform a slope analysis. Please click here to get more information on this topic.
What is BTPS and how is it used?
BTPS Correction is used to convert flow and volume measured at ambient conditions to the conditions within the lungs. Ambient conditions are called ATP (ambient temperature, pressure); the conditions within the lungs are called BTPS (body temperature, pressure, water vapor saturated).
Click here for more information.
Can the EasyOne Pro/LAB be connected to my network for backup and data sharing?
Yes. Connecting the device to your network allows several additional benefits.
o Take advantage of your network data backup processes
o Print directly to your network printers
o Save reports electronically (such as PDF) directly to a network folder
o Connect with your EMR system
o Take advantage of a more powerful SQL Server database engine (click herefor more detailled instructions)
o Connect multiple devices to a single, shared database
o Get access to the device database from your PC using our free EasyOne Connect PC software application
What do I do when the EasyOne displays Self-Test Error #49?
This error is usually a communication error shown while printing. It means something wasn’t quite ready. Typically, it is best to clear the error by hitting 1 then 3 then 5 on the keypad and to try again. Most Self-Test errors can be cleared and investigated with the code 1-3-5.
Do I need any special calibration equipment for the EasyOne Pro/LAB?
All EasyOne products are designed to require no calibration and minimal maintenance. The device is designed to remain in calibration throughout its lifetime. No calibration procedures are required prior to testing. Our TrueFlow ultrasonic technology assures accurate volume and flow measurements every time. And our unique automated TrueCheck process assures that all gas measurements are accurate for each test. You may choose to use the optional 3-liter calibration syringe to verify volume and flow accuracy, as recommended by ATS/ERS.
How long does it take to test a patient with the EasyOne Pro/LAB?
A PFT session including spirometry and DLCO generally takes less than 20 minutes.
What are my options for printing results from the EasyOne Pro/LAB?
The EasyOne Pro/LAB is compatible with virtually all PC-style USB printers, without the need for external driver installation. The printer can be connected directly to a USB port on the rear of the device. We can sell you a printer with the device, or you can supply your own.
You can also connect the device to your network where it will automatically find any connected, compatible printers avoiding the need for a dedicated printer for your PFTs.
What consumables are required for the EasyOne Pro/LAB?
Spirette: Each test performed requires the use of a spirette. This is a single-patient-use mouthpiece which ensures that no contamination can reach the internal flow path of the device. This means that no cleaning is required between patients, and no calibration, ever. Simply toss the spirette after each test session.
Barriette: For a DLCO test, in addition to the spirette, you will need to use a barriette. This protects the valve and hose system from contamination, eliminating the need for cleaning between patients.
FRC barriette: This is similar to the DLCO barriette, but used only when performing a multi-breath washout test.
Gasses: The DLCO test requires a standard medical grade DLCO gas mixture consisting of 0.3% Carbon Monoxide, 10% Helium, 21% Oxygen, remainder Nitrogen. The multi-breath washout test requires 100% Oxygen. These gasses are readily available from your local medical gas supplier in various tank sizes. We will assist you in selecting the appropriate tank regulators required for connection to the device.
How much space will an EasyOne Pro/LAB require in my office?
The device itself is self-contained and measures only 270 x 335 x 270 mm (10.6 x 13.2 x 10.6 inches) (h x w x d). No additional PC, monitor, keyboard or control unit is required. This allows it to easily fit on a counter. You will also need to allow for storage of the gas tank(s) which come in a variety of sizes, and can usually fit comfortably in a corner, or under the counter.
What are the maintenance requirements for the EasyOne Pro/LAB?
The EasyOne Pro/LAB is designed to require minimal maintenance. The annual replacement of four external components is ALL that is required to keep the system running smoothly. These components are available as a convenient kit. Installation is done in minutes and requires no special tools.
How do I fix a report with missing information, such as data or curves?
If you are missing parameter data or a report seems incomplete, it might be due to your printer’s ink supplies. Try setting the spirometer to HP BW in the Configuration and Report Settings. If the color ink was causing the problem, this should solve it. If it was the black ink, you will get a completely blank page.
Why doesn't the EasyOne recognize my printer?
The EasyOne only works with a limited set of printers because it uses specific, aging Print Command Languages. Please check to see if your printer is on the Printer Compatibility List. If your printer is listed but the spirometer still won’t work, verify that the printer is not in error mode and check all points of connection with the EasyOne.
How can I improve my connection from my EasyOne to my computer or printer?
There are a few points that can be checked and improved. The EasyOne uses two AA batteries and, when these get low, communication may falter. Fresh batteries are best. Also, the 9-pin contacts on the bottom of the EasyOne and Cradle may oxidize. Polish these with an alcohol swab to clean them. Finally, the USB ports may be damaged. Check the cradle and printer or computer for signs of wear and try a new USB cord. The EasyOne uses a common type A/B USB cord.
How do I create a PDF from an EasyOne?
You will need to use our software. You can download EasyWare 2013, which was created for the EasyOne, and use a PDF writer like CutePDF to activate PDF options, or you can use EasyConnect and create a PDF through the Report menu on a test synchronized to that program.
Where can I download the software for Easy on-PC?
The Easy on-PC software, EasyOne Connect, can be downloaded free of charge directly from our website. Click here for the download.
Can the software be downloaded onto multiple devices?
Yes, the EasyOne Connect software can be downloaded onto as many laptop, PC or tablet devices as desired. There are no license requirements.
Is a laptop, PC or tablet provided with the system?
No, a laptop, PC or tablet must be purchased separately. The device specifications can be found in the Requirements PC/Laptop section under Specifications on the Easy on-PC page.
What are the minimum computer requirements?
Please consult Section 1.11 in the manual here for the latest computer requirements. Note that for the Easy on-PC latest version, V02.02.00.14 or greater, the following operating systems are no longer supported: Windows XP SP3 and Windows Vista.
What are the tablet requirements?
The general requirements for notebooks and tablets the following:
- USB interface
- Windows operating system (32 or 64 bit)
- Hard disk capacity of 1 GB installation and up to 4 GB of data
- RAM 2 GB
The embedded versions of Windows are no longer compatible.
What incentive screens are available in the EasyOne Connect software?
The EasyOne Connect software for the Easy on-PC offers a variety of animated screens for children as well as adults. These incentive screens, in addition to the real-time curves, encourage the patients to help them achieve high quality spirometry results. Here are some examples of the pediatric incentive screens available:


How do I backup my patient data?
Data can safely be exported by using the “Export Data” feature or “Backup” feature within the Storage tab in the configuration.
Where can I purchase the Easy on-PC?
All our products can be purchased through our authorized distribution partners. For US customers, please contact us to receive more information on finding your local dealer. International customers please click here for a list of dealers in your country.
Where can I purchase the EasyOne Air spirometer?
All our products can be purchased through our authorized distribution partners. Please contact us to receive more information on finding your local dealer.
What are my options for printing results from the EasyOne Air?
A compatible printer can be connected directly to the cradle provided with the device. Please consult our Printer Compatibility List including thermal printer options.
You can also use our free companion PC software, EasyOne Connect. The device is connected to the PC via the USB cradle provided. Data from the spirometer is synchronized with the PC database, allowing you to print to any printer connected to that PC or network. EasyOne Connect also allows you to view, trend and create PDF reports.
It is also possible to send pdf reports directly to a connected PC via file exchange.
What consumables are required for the EasyOne Air spirometer?
The EasyOne Air uses the patented ndd Flow Tube, a single-patient-use mouthpiece which ensures that no contamination can reach the internal flow path of the device. This means that no cleaning is required between patients, and no calibration, ever. Simply toss the Flow Tube after each test session.
What are the options and benefits of connecting the device to my PC?
EasyOne Connect is the free companion PC software for the EasyOne Air. It can be downloaded directly from our web site. Here are a few of the features and benefits of using EasyOne Connect:
- Long-term storage of test data
- Ability to enter patient demographics from the PC
- Connectivity with your EMR system
- Ability to over-read and manipulate data on the PC
- Export of data in many different formats, including the ability to create PDF reports
- Bluetooth allows wireless viewing of real-time curves on PC display, or use of real-time animated/pediatric incentives
- View and print trend graphs
- Create custom test report templates
How many tests can be saved in the device's memory?
The on-board memory for the EasyOne Air spirometer can store approximately 10,000 tests. For long-term storage the data can be synchronized to the EasyOne Connect PC software database.
How long does the battery last?
The EasyOne Air spirometer uses a rechargeable lithium-ion battery. An empty battery can be fully charged in about 5 hours. A fully-charged battery can support the performance of approximately 100 spirometry test sessions. While the battery life is highly dependent on the intensity of use, ndd generally recommends that the battery be replaced every 3 years to ensure the best user experience.
Do I need to calibrate the Easy on-PC spirometer?
No. All EasyOne products are designed to not require calibration. ndd’s patented TrueFlow technology is the only technology proven to remain stable over its lifetime. A number of independent papers have been published that confirm this long-term stability.
For organizations like NIOSH/OSHA or Social Security/Disability, where calibration checks are required, ndd offers a 3-Liter calibration syringe. A calibration check (cal-check) is not to be confused with calibration. A cal-check simply validates that the device is within calibration limits. Unlike calibration, a cal-check does not adjust the calibration values.
Do I need to calibrate the EasyOne Air spirometer?
No. All EasyOne products are designed to not require calibration. ndd’s patented TrueFlow technology is the only technology proven to remain stable over its lifetime. A number of independent papers have been published that confirm this long-term stability.
For organizations like NIOSH/OSHA or Social Security/Disability, where calibration checks are required, ndd offers a 3-Liter calibration syringe. A calibration check (cal-check) is not to be confused with calibration. A cal-check simply validates that the device is within calibration limits. Unlike calibration, a cal-check does not adjust the calibration values.
The Spirette has no filter – is it still safe and hygienic?
The Spirette is a single-use item. By changing the Spirette between patients no contamination from exhaled breath or mucus can be transferred from one patient to the next – risk of cross-contamination is eliminated. Find scientific proof that EasyOne devices with Spirettes offer an absolutely hygienic and reliable solution here.
Device not connected. Easy on-PC not recognized in EasyOne Connect
If your Easy on-PC is not recognized in the EasyOne Connect Software, ensure the device is connected directly to the PC without a USB hub.
If the error continues, the cause may be the USB cable.
Cable damage can lead to intermittent or consistent connection issues.
Cable damage can be caused by improper storage or handling.
Do not wrap the cable around the handle of the device.
Keep the cable away from sharp edges.
If you notice any damage to the cable, discontinue use and contact ndd service and support.
The cable can be replaced at ndd or at a certified repair location.
Learn more by watching the video below.
How can I change the ATS/ERS Spiromety Standard setting on my EasyOne Air device
The ATS/ERS spirometry standard setting can be viewed or changed in the menu: Tools > Settings > Spirometry.
The setting is called ATS/ERS Standard. Changes will only affect future tests. Existing tests will not be affected.
How do you perform spirometry?
There are multiple steps for completing a spirometry test. For visual reference, you can review a video on how to perform a spirometry test by clicking the video button below.
- Take time to create a rapport with the patient—effective communication and participation between the patient and medical professional results in more consistent and robust testing results.
- Accurately measure the patient’s height.
- Carefully and correctly enter the patient data into the spirometer.
- Demonstrate the correct techniques and maneuvers to the patient prior to completing the test.
- Use body language to coach for a maximal inhalation.
- Loudly prompt them to BLAST out the air.
- For the next six seconds, quietly encourage the patient to continue BLASTING by saying, “keep going, keep going.”
- Monitor the patient carefully during the maneuvers.
- Obtain a good test session with a quality grade (A or B).
Meet Buddy—your spirometry coach, making spirometry testing easier and more enjoyable!
Learn more about Buddy!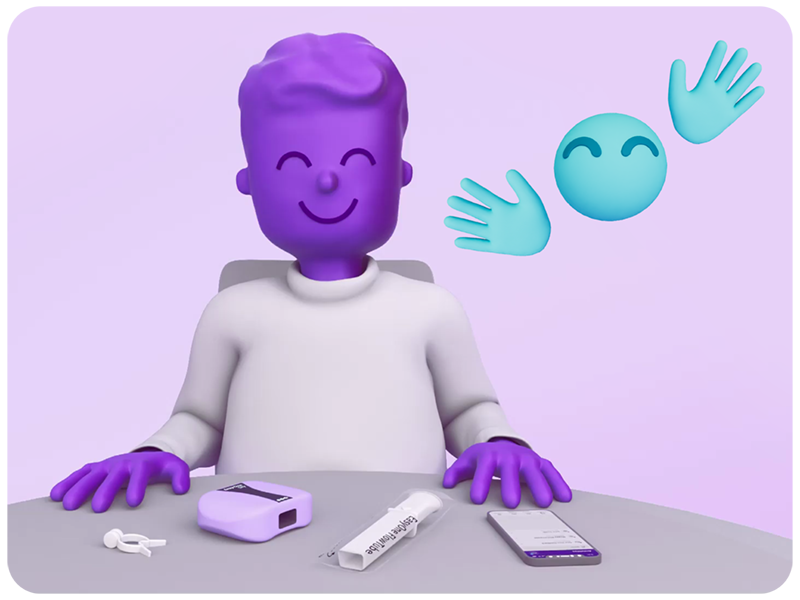
How long does a spirometry test take?
A spirometry test typically takes 10 to 15 minutes, depending on the patient’s ability to follow instructions and complete the required breathing maneuvers. The test involves taking a deep breath and forcefully exhaling into a spirometry device multiple times to achieve accurate results.
Healthcare providers may repeat the test after administering a bronchodilator to assess lung function improvement. Proper coaching and technique are essential for reliable measurements.
Learn how to perform a spirometry test step by step.
Read the blog.
How to backup my database in EasyOne Connect
In EasyOne Connect, go to: Utilities > Export Data > tick Patient Data > click Export. Save the file in the preferred location.
Learn more by watching the video below.
How to backup the database from an EasyOne Air
In this instruction will guide you through the options to backup a database from the EasyOne Air device. Prepare your device and have an SD card ready to follow along with the instructions. Let’s have a look on how to backup from the Easy One Air.
- To perform this operation you need an SD card.
- The SD card slot is located next to the battery. To access it, open the battery door and remove the battery.
Alternative to the SD card database backup you can also synchronize the tests to your EasyOne Connect on the PC and save the database from there, but be aware that existing tests will be merged. We will not discuss this option here, but focus on the option when using the stand alone device. Check the EasyOne Connect training module for a more comprehensive instruction to backup on the PC software.
- Ensure the SD card is inserted and turn on the device.
- In the menu, go to Tools > Database > Backup and confirm with Yes.
- Enter your administrator password and confirm with OK. Optionally enter an encryption password. Important! If a password is entered here, it will need to be entered in the restore steps. This password cannot be recovered.
- Click confirm and then again on OK
All set. The database is saved on your SD card.
In this instruction will guide you through the options to backup a database from the EasyOne Air device. Prepare your device and have an SD card ready to follow along with the instructions. Let’s have a look on how to backup from the EasyOne Air.
- To perform this operation you need an SD card.
- The SD card slot is located next to the battery. To access it, open the battery door and remove the battery.
Alternative to the SD card database backup you can also synchronize the tests to your EasyOne Connect on the PC and save the database from there, but be aware that existing tests will be merged. We will not discuss this option here, but focus on the option when using the stand alone device. Check the EasyOne Connect training module for a more comprehensive instruction to backup on the PC software.
- Ensure the SD card is inserted and turn on the device.
- In the menu, go to Tools > Database > Backup and confirm with Yes.
- Enter your administrator password (default 8005) and confirm with OK. Optionally enter an encryption password. Important! If a password is entered here, it will need to be entered in the restore steps. This password cannot be recovered.
- Click confirm and then again on OK
All set. The database is saved on your SD card.
Learn more by watching the video below.
For more information see the AppNote.
How to change or update the ATS Spirometry Standard setting in EasyOne Connect
The ATS Spirometry Standard setting can be viewed or changed in Utilities > Configuration > Test tab > FVC/FVL tab.
The setting is under ‘Applied Spirometry Standard’. Click Save after making changes.
Changing the setting will only affect future tests.
Learn more by watching the video below.
How to change or update the header information for my reports in EasyOne Connect
The EasyOne Connect header information can be changed in Utilities > Configuration > General tab > Header tab.
Input your facility’s information and click Save.
This information will appear on the top left of the main menu. It will also appear on the top of the report print out.
Learn more by watching the video below.
How to change or update the Predicted Reference and Interpretation setting in EasyOne Connect
The selected predicted reference and interpretation can be changed in Utilities > Configuration >Test tab > Predicted tab.
Refer to the Predicted Reference application note for more information on each of the options.
The interpretation can be changed in the same location under ‘System Interpretation’.
- Previous tests can be updated with the ‘Update Test’ button.
- Enter your user ID and press Login. Click OK to confirm the changes and then Yes to start the update. The update time varies and may take several minutes depending on database size.
- Click OK once complete and then click Save
Learn more by watching the video below.
For more information see the AppNotes Recalculation Predicted Values and Predicted Normal Values Overview.
How to change the displayed parameters in EasyOne Connect
The parameters can be changed in Utilities > Configuration > Test tab and then select the tab for the specified test.
The video will show how to adjust the FVL parameters.
- Click the ‘Select’ button under the Parameters section.
- The Display side shows the parameters on the test screen.
- The Print side shows the parameters on the Report screen.
- Use the scroll bar to find certain parameters and use the left and right arrows to move the parameters between the available and selected columns.
- Use up and down arrows to change the order of the parameters.
- Click Save and repeat this process for other test types.
Learn more by watching the video below.
How to change the header information on my EasyOne Air device
The EasyOne Air header information can be changed in Tools > Settings > Print.
The header information will appear on reports directly printed from the device.
Learn more by watching the video below.
How to change the report settings in EasyOne Connect
Report settings are found in the Configuration section of EasyOne Connect in the ‘Test’ tab and the ‘Report’ tab.
Review the settings on these pages to modify your reports.
The report layout can be changed on the Report screen in the Layout selection drop down menu.
Learn more by watching the video below.
How to check which firmware version is installed on my EasyOne Air device
The EasyOne Air firmware version can be found in Tools > Device.
Learn more by watching the video below.
How to check which version of EasyOne Connect software is installed on my PC
The EasyOne Connect software version can be found in Utilities > Configuration > General Tab > Header tab.
Click ‘About’ and a software details box will appear that lists the software version.
The latest software can be downloaded from our website.
Learn more by watching the video below.
How to coach a patient to perform spirometry
The typical spirometry exam is a three-phased process – each with their own coaching techniques to help patients produce an effective test.
- Phase 1
In the first phase, the goal is to instruct the patient on the proper techniques to apply their mouth to the spirometry mouthpiece. Best results are achieved when the patient takes a deep, deep breath, placing the mouthpiece between their teeth, and sealing the mouthpiece with their lips. - Phase 2
The second phase is the BLAST. This is when the patient will blow out as hard and as fast as possible. Coaching a patient in this phase is best achieved by developing a rapport with them prior to the exam, as the tester will learn which level of coaching is best for that individual patient. - Phase 3
The final phase is the remaining 5 to 6 seconds of exhalation. In this phase, you’ll quietly encourage the patient to “keep blowing” to complete the exhalation.
- Phase 1
How to configure EasyOne Connect for an existing GDT integration
This example is of a GDT setup.
A GDT folder can be set up in Utilities > Configuration > EMR tab.
- Select GDT from the drop down menu
- Select the Transfer folder for GDT.
- Review the remaining settings.
- Select if a report should be attached.
- Click Save.
Learn more by watching the video below.
For more information see the AppNote.
How to configure EasyOne Connect for an existing HL7 integration
This example is of an HL7 setup.
An HL7 folder can be set up in Utilities > Configuration > EMR
- Select HL7 from the drop down menu.
- Select the In and Out Transfer folders for HL7.
- Review the remaining settings.
If a report is selected to be attached, select the folder name, structure, and file type.
- Click Save.
For more information see the AppNote.
How to configure EasyOne Connect for an existing XML integration
This example is of an XML setup.
An XML folder can be set up in Utilities > Configuration >EMR tab
- Select XML from the drop down menu
- Select the In and Out transfer folders for XML.
- Review the remaining settings.
- If a report is selected to be attached, select the folder name, structure and file type.
- There are optional settings to include the trial data and curve data.
- Click Save once complete.
Learn more by watching the video below.
For more information see the AppNote.
How to create a new patient database in EasyOne Connect
A new database can be created in Utilities > Configuration > General tab > Storage tab, click New, Select File Based, click New Name the file, click Save.
Setting a password is optional. This password is needed to open the database and cannot be recovered. Make sure to remember the password, otherwise the data cannot be accessed.
Click OK, Click save.
The software will refresh and the new database will be loaded.
Learn more by watching the video below.
How to enable User Logon on my EasyOne Air device
User handling can be enabled to define certain user permission levels and require a log on when the device is turned ON.
- Users can be set up in Tools > User.
- Enter the admin password to access the settings.
- Select ‘Add User’ to create a new user. Users are assigned to a user group.
- There needs to be at least one administrator who has access to all menus and functions. Technicians have restricted access.
- Confirm the information entered is correct.
Enable user logon. Go to: Tools > Settings > Security.
- Enter the default admin password (default 8005)
- Select ‘User logon required’
The device will then prompt a logon when it is turned ON.
Learn more by watching the video below.
How to export a single patient database
ndd Service and Support may request a single patient database for review if there are any questions about test performance.
A single patient database can be exported from EasyOne Connect in the following:
Patients > Select the patient > Click the double arrows to expand the menu > Select Database > Click Save File as and save the file > Click Export.
How to export the EasyOne Connect configuration file from one PC and import into another
The configuration file can be exported from one PC and loaded into the software on another PC. This is an easy way to transfer settings.
The configuration file can be exported from Utilities > Export Data > tick Option Settings > click Export > save the file.
The configuration file can be loaded in Utilities > Configuration > Storage tab > Load Configuration > Find the file and click open.
The software will reload.
Learn more by watching the video below.
How to export the logfile from EasyOne Connect
The log file can be exported from EasyOne Connect in Utilities > Export Data > select Logging Information > click Export.
Some errors prevent the software from opening, so another way to retrieve the log file is by navigating to the path C:\ProgramData\ndd\EasyOne Connect\Log.
There you should find the Files EWPro.log and EWPro_bak.log
Learn more by watching the video below.
How to export the report as pdf in EasyOne Connect
Patient reports can be exported as a PDF file.
- Click Patients and select a patient.
- Open the patient history.
- Select a test > Click Report > select Print menu.
- In the top right corner, click Export to and select PDF.
- The File Explorer will open.
- Save the file in the desired location.
- The software will then prompt to open the PDF file for review.
- Click Yes to open the PDF or click No to return to the software.
Learn more by watching the video below.
For more information see the AppNote.
How to export the XML database from EasyOne Connect and convert it to a CSV file
The EasyOne Connect Patient Data can be exported as an XML file and converted to a CSV file. First locate the EasyOne Connect Data Export application note found on our website.
- Click on the link in the app note to download the zip file, which contains a library of required files needed for the conversion.
- Extract the files from the ZIP folder.
- In Easy One Connect export the XML file of the database. Go to: Utilities > export XML.
- Save the XML file in the XML input folder in the conversion file library.
This will export the entire database. Single tests can also be exported as an XML file in the patient history.
The Conversion File library contains several conversion options that include different parameters.
- Double click on a bat file to run the conversion. This will convert any files in the XML input folder.
Press any key to close out of the conversion window.
The converted CSV file is found in the CSV output folder.
Learn more by watching the video below.
How to find the logfile on the EasyOne Air
Follow these steps to find the EasyOne Air log file.
First connect the cradle to the PC and then dock the EasyOne Air device.
Next, open the File Explorer, find this PC, EasyOne Air and exchange.
The log file will be named syslog.txt
How to import a patient database
A database can be imported into the currently selected database in Utilities Configuration, the General tab, the Storage tab, click Import, Select File Based.
Click select. Select the database file to be opened.
Click Open. Click OK.
When the import is complete, click Save.
The chosen database will be merged with the currently selected database.
Learn more by watching the video below.
How to locate the currently selected database in EasyOne Connect
In EasyOne Connect, go to: Utilities > Configuration > General (tab) > Storage (tab) and there it is listed under database name. Default location on the PC:
C:\ProgramData\ndd\EasyOne Connect\EasyOneConnect.sqlite.
Learn more by watching the video below.
How to rename the options database in EasyOne Connect (reset EOC configuration)
The EasyOne Connect software has an Options database, which is a file that contains all the settings and utilities. Replacing this file may resolve errors with EasyOne Connect.
Please note, following these steps, we’ll revert the software to default settings and remove EMR setups.
- Navigate to C:\ProgramData\ndd\EasyOne Connect\
- Hint: The ‘program data’ folder is a hidden folder
- Rename the EasyOne Connect options.mdb file.
Once the file is renamed, reload the software to force the file to automatically regenerate.
Check if the issue is resolved.
Learn more by watching the video below.
How to restore a database backup on the EasyOne Air device
This instruction will guide you through the options to restore a database backup on the EasyOne Air device. The backup data is located within the backup folder on the SD card. See how to perform a backup. If the backup data is encrypted, the encryption password is needed to perform the database restore.
All data created and settings change during the time between backup and restore will be permanently lost, which also includes audit trail entries.
It is strongly recommended to perform a backup before restoring the database.
A database restore can only be performed by users with admin level rights or by the default admin user if user management is not activated. Let’s have a look on how to restore a database to the EasyOne Air.
- To perform this operation, you need an SD card with a backup on it. The SD card slot is located next to the battery. To access it, open the battery door and remove the battery.
- In the menu, go to: Tools > Database > Restore and confirm with Yes.
- Enter your administrator password.
- Confirm with OK.
- Now select the backup database you would like to restore. Optionally enter an encryption password. If the file is not password protected, then leave the password field empty and click Confirm.
- Here you go, the database is being restored. Wait for the operation to be completed and click OK.
The device will request a reboot. Follow along with the instructions on the screen and check the results in your restored database.
Learn more by watching the video below.
For more information see the AppNote.
How to select a different patient database in EasyOne Connect
A different database can be selected in Utilities > Configuration > General tab > Storage tab.
Click Select > Select File Based.
Click Select. Select the database file to be opened. Click Open Review the database path. Click OK Click Save.
The software will refresh.
Learn more by watching the video below.
How to select the predicted reference and interpretation settings on my EasyOne Air device
The selected predicted reference and interpretation can be changed in the menu: Tools > Settings > Spirometry.
Refer to the Predicted Reference AppNote for more information on each of the options.
Predicted Set 2 is for pediatric selections.
The interpretation can be changed under System Interpretation.
Previous tests can be updated with the ‘Recalculate’ button under Patients or in the EasyOne Connect software.
If a test is started in EasyOne Connect via the Bluetooth feature, EasyOne Connect settings will be used.
Changing the settings on the EasyOne Air device only applies for standalone tests.
Learn more by watching the video below.
For more information see the App Notes Predicted Normal Values Overview and Recommended Printers for EasyOne Pro.
How to setup or enable the User Handling to require EasyOne Connect software logins and to define user permission levels
User handling can be enabled to require software logins and to define user permission levels. Users can be set up in Utilities > Configuration > General tab > User Handling tab.
- Enter the admin password to access the settings.
- Click on the Local Users tab to create users and edit permissions.
- Select ‘Add’ and enter the information to create a user.
- At least one user needs to be set up in the admin user group. User groups have different permission levels.
- Click ‘Permissions’ to add user groups and to view or change the permissions for each user group.
- Click on the ‘General Settings’ tab to enable user management and
- Click Save.
This will prompt the software to restart and require a user to log in. The bottom left shows the user logged in and provides a log off option.
There is also an option to integrate with your Active Directory. Contact your IT department an refer to the application note on our website For more information.
Learn more by watching the video below.
For more information see the AppNote.
How to troubleshoot a "baseline setting failed" on the Easy on-PC
Each time a test is started, the baseline is set. The software will prompt you to block the Spirette for this step so there is no airflow. Passing the baseline setting is required before the test can start. If the baseline fails, there may be an error stating:
“baseline setting failed” “Check Spirette insertion” “Device initialization failed”
Here are a few steps to try when the baseline setting error occurs.
- First, ensure the Spirette is blocked and fully inserted.
- Open the Spirette wrapper halfway from the bottom, leaving the top part wrapped.
- Insert the Spirette fully align the arrows.
- Push the Spirette in until there are no gaps.
- Avoid any airflow, including vents, fans, or windows.
- The end of the Spirette can also be blocked by a hand.
- If the error still occurs, try changing the Spirette out with a new one.
If the error still occurs after changing the Spirette, try to reset the amplitude.
Resetting the amplitude on the device may resolve the baseline setting errors.
To reset the amplitude, follow these steps:
- Start a test and attempt to set the baseline.
- When the baseline setting fail error appears, remove the Spirette and reinsert it at a 90° rotation. Intentionally incorrect.
- Click Retry. There will be another error.
- Insert the Spirette correctly again and restart the test to check if that resolved the error.
These steps may need to be attempted a few times.
Learn more by watching the video below.
How to troubleshoot Bluetooth connection issues with my EasyOne Air device
Any Bluetooth connection issues with the EasyOne Air device will prevent the device from connecting consistently with the EasyOne Connect software. This often occurs when the EasyOne Air device is paired to multiple nearby computers. Here a few steps to try and resolve:
- Restart the PC and EasyOne Air
- Check the PC for Windows updates
- Ensure the EasyOne Air is within 10 meters of the PC
Another troubleshooting step is to delete all the Bluetooth connections from the EasyOne Air device. To do this go to:
- Tools > Settings > Bluetooth
- Scroll to the bottom of the page to BT Connections
- Press and hold ‘long click to delete all..’
- Enter the admin password
- Click yes to confirm deleting the connections.
- Return to the main menu.
Another step is to remove the device from the list of paired Bluetooth devices on the PC and re-add it.
Follow along with the video to remove and re-add the device.
For more information see the AppNote.
How to troubleshoot connection issues (printing or synchronization) on the EasyOne Air device or cradle
A possible issue with the EasyOne Air device is USB connection issue. These prevent data from synchronizing to the PC or printing in a direct print setup. Here are some steps to try to troubleshoot the issue.
- Ensure the USB cable is connected to the correct port on the cradle. The USB cable should be inserted in the port on the left of the back of the cradle.
- USB connection issues can be caused by damaged cables or ports. Check the USB cable to ensure there is no damage to the cable or connector.
- Try a different USB port on the PC or a different PC.
- Do not use a USB hub.
If these troubleshooting steps do not resolve the issue, contact local IT to check for any USB port blocks or PC settings that could prevent connection.
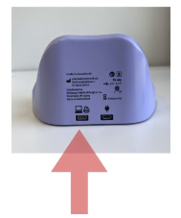
Learn more by watching the video below.
How to troubleshoot FlowTube detection or insertion issues on the EasyOne Air device
Each time a test is started, the EasyOne Air will recognize the correct position of the FlowTube and provide feedback. If the FlowTube is not placed correctly, the device feedback may include:
- No EasyOne FlowTube detected
- Please use an EasyOne FlowTube
- Check the EasyOne FlowTube for damage
- Check for correct EasyOne FlowTube insertion
A troubleshooting step for the FlowTube detection error is to try a new FlowTube as a damaged one can cause this error.
Another troubleshooting step is to ensure the FlowTube is fully inserted into the device, align the arrows and push the FlowTube in until the FlowTube is flush against the device.
The FlowTube detection error could also result from residue in the sensor tube.
Cleaning inside the sensor tube can cause these residues and should be avoided.
Please refer to the operator’s manual for cleaning instructions.
Learn more by watching the video below.
How to update the EasyOne Air firmware via an SD card (only with instructions from ndd service and support)
The installer file is provided by the ndd service and support team on request. The purpose of the SD card update is to execute the update directly and force it as soon as the device is turned on. Minimal user interaction is needed other than inserting and removing the SD card.
First, let’s prepare our card. These steps need to be done on your PC.
- Grab the ZIP file you received from ndd service and support and copy it to the SD card.
- Unzip it there.
- Then open the folder and mark the three files.
- Copy them to the top level folder of the SD card. The card is now ready.
Label this SD card accordingly with the firmware version or ensure to delete the files after our update is completed.
- Safely remove the SD card from the PC and let’s use it on the EasyOne Air device.
- Unlock the battery door with an appropriate tool, turn the door lock clockwise to unlock, then remove the battery.
- Insert the SD card, insert the battery and close the battery door again.
- Use an appropriate tool to lock it.
- Now turn on the device, read the information on the screen and confirm you’d like to update to the mentioned firmware version. The update should start right away.
- Do not interrupt the update process. Once the progress bar is full, follow the instructions on the screen, confirm with OK, and let the device turn off.
You have updated your EasyOne Air device successfully.
Don’t forget to remove the SD card before you start using it for testing.
Learn more by watching the video below.
For more information see the AppNote.
How to update the EasyOne Air firmware via EasyOne Connect software or exchange drive
This instruction will guide you through the options to update the firmware on your EasyOne Air device. Prepare your device to follow along with the instructions.
There are mainly three ways:
- via the EasyOne Connect software
- via the Exchange Drive
- via an SD card
This instruction will guide you step by step through the procedure of option 1. and 2. We will handle the SD card update (option 3) in a separate FAQ.
Software updating via EasyOne Connect is the preferred updating method. If you’re using the device in combination with multiple EasyOne Connect PCs, it may be required that also the other PCs need to be updated. Please refer to the version history for software compatibility, which is available on the ndd website.
- To start the procedure, download the latest EasyOne Connect software from the ndd website and run the installer.
- Connect the EasyOne Air USB cradle to the PC.
- Start the EasyOne Connect software, turn on the EasyOne Air and place it into the USB cradle
- You will see a message indicating a software mismatch and an option to update the device. Choose yes.
- The firmware is now prepared for the update and shortly you will see a progress bar indicating the status.
- Leave the device connected until the update process is completed.
Let’s continue with the update via the Exchange drive. (Option 2) If you are not using the device in combination with the EasyOne Connect software, you will need to go through this procedure.
- To start the procedure, download the latest EasyOne Air firmware from the ndd website.
- Connect the EasyOne Air to the PC via the cradle.
- Turn it ON and the device will appear on your PC as a drive.
- Open it and you will see the Exchange drive.
- Copy the downloaded firmware file to it.
- Now that the firmware is stored on the device, we can simply perform the update from the device menu.
- To start the update, take the EasyOne Air off the cradle and go to Tools > Update.
- The device invites you to install the downloaded firmware file.
- Click OK
- If requested, enter the user password.
- Wait a few minutes for the update to complete. Do not turn off the device until the update has finished.
- Once the update is complete, choose OK to shut down the device.
Learn more by watching the video below.
For more information see the AppNote.
What are examples of obstructive lung diseases?
A few examples of obstructive lung disease include:
- Chronic Obstructive Pulmonary Disease (COPD)
- Emphysema
- Chronic Bronchitis
- Asthma
- Bronchiectasis
What are examples of restrictive lung disease?
A restrictive lung disease is exactly that – one where a restriction occurs in the respiratory system.
A few examples of restrictive lung disease include:
- Interstitial lung diseases such as idiopathic pulmonary fibrosis
- Sarcoidosis
- Obesity
- Scoliosis
- Neuromuscular diseases such as muscular dystrophy or ALS
What are the disease states that are associated with high Diffusion Capacity (DLCO)?
- Asthma
- Left-to-right intracardiac shunts
- Polycythemia
- Pulmonary hemorrhage
Understanding lung function tests and their importance in respiratory health.
Read the blog
What are the disease states that are associated with low Diffusion Capacity (DLCO)?
- Emphysema
- Interstitial Lung Disease
- Idiopathic Pulmonary Fibrosis
- Cystic Fibrosis
- Congestive Heart Failure
- Primary Pulmonary Hypertension
- Chronic Pulmonary Emboli
- Anemia
- Left-sided heart disease (systolic and diastolic heart failure, Mitral Valve Disease)
Understanding lung function tests and their importance in respiratory health.
Read the blog
What are the important parameters in spirometry?
A spirometry test will produce a series of results or parameters that help medical professionals easily complete this exam. The three most important spirometry parameters are the FEV1, FVC, and FEV1/FVC ratio parameters.
A simple guide to reading spirometry results.
Get the tips from Buddy
What indictations are used for spirometry?
There are multiple patient-symptoms or medical conditions that justify the use of spirometry. A few of the most common indicators include:
- To manage asthma and COPD patients
- Evaluate shortness of breath
- Perform surveillance for occupational-related lung disease
- Evaluate former or current smokers over the age of 45 for COPD
- Classification of COPD. (COPD is an umbrella term that covers multiple respiratory diseases including chronic bronchitis, emphysema, and idiopathic pulmonary fibrosis (IPF))
- Monitor disease progression
- Measure response and progress due to treatment, medication, and respiratory therapy
- Smoking cessation
Tips from leading experts on the value of spirometry.
Watch the webinar
What is a complete pulmonary function test?
A complete pulmonary function test is a comprehensive assessment of lung function that includes three key components: spirometry (possibly pre/post bronchodilator), lung volume measurements, and diffusing capacity for carbon monoxide (DLCO).
Together, these tests provide a full picture of how well the lungs are ventilating (moving air), how much air they can hold, and how efficiently they transfer gases like oxygen into the bloodstream.
Explore how ndd’s EasyOne solutions bring accuracy and ease to every step of pulmonary function testing.
Learn more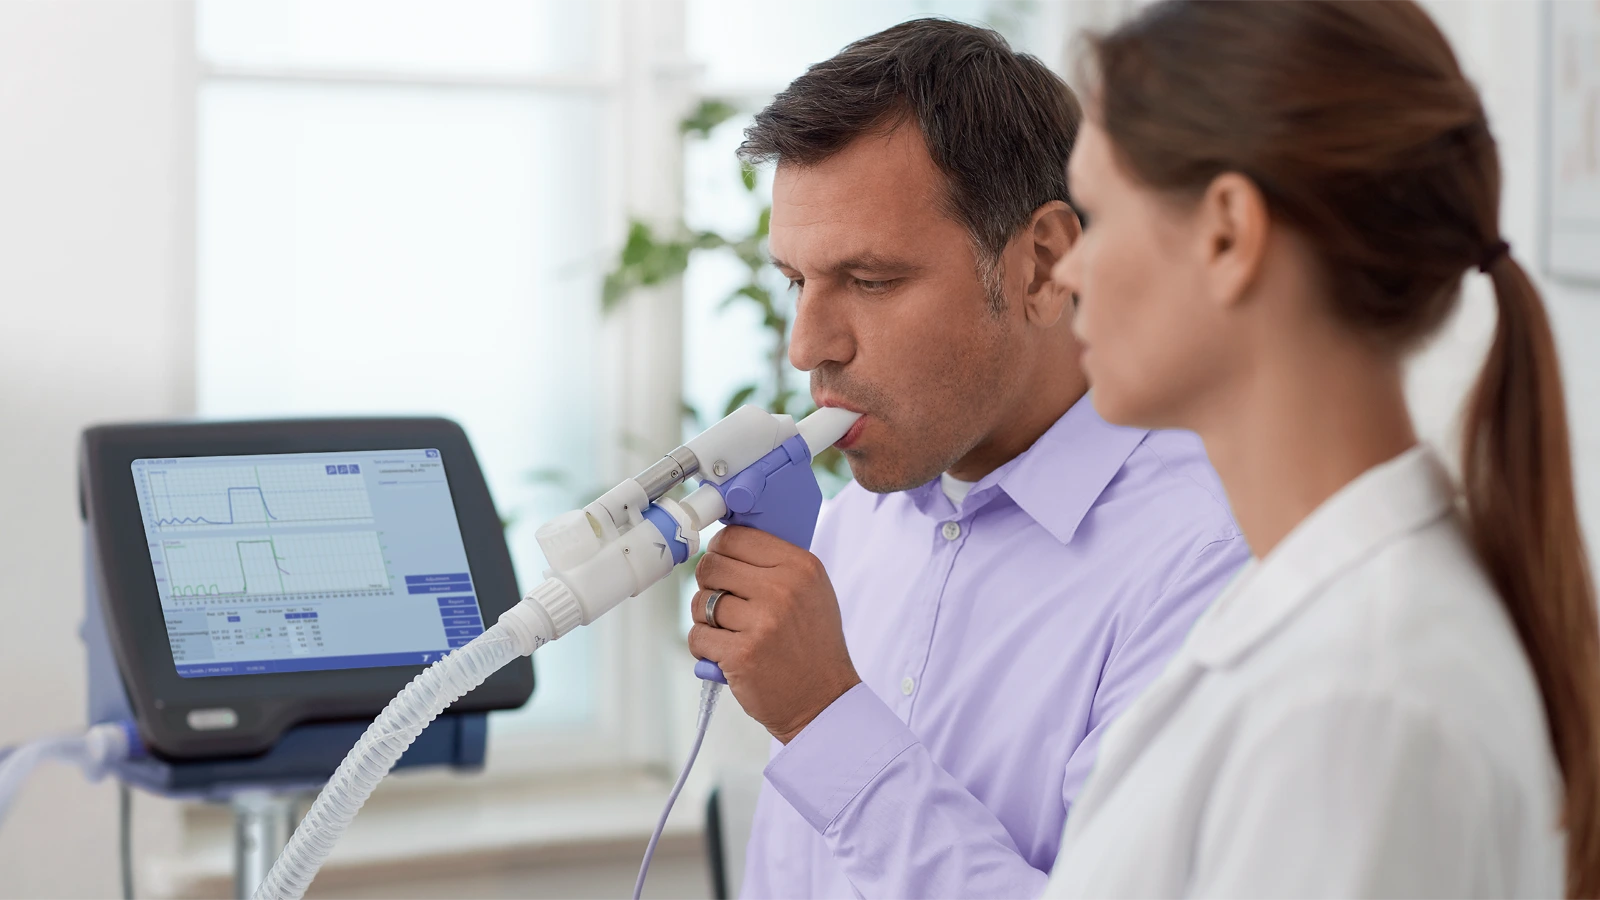
What is a diagnostic spirometer?
A diagnostic spirometer is a medical device that is used to measure lung function. It can be a portable or stationary spirometry device that is operated by a medical professional who is specially trained in proper testing procedures and techniques to produce a more consistent and reliable result.
ndd EasyOne spirometry solutions
Speak to a clinical specialist today!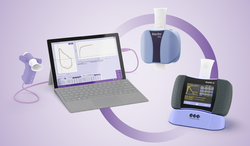
###
What is a pulmonary function test?
A pulmonary function test (PFTs)are a group of noninvasive tests that monitor the performance of the lungs. They measure lung volume, capacity, rates of flow, and gas exchange.
Adding the following: PFTs typically include several different types of tests:
- Spirometry, which measures how much air you can breathe in and out and how quickly you can exhale.
- Lung volume measurement, which determines the total amount of air the lungs can hold.
- Diffusion capacity test (DLCO), which evaluates how efficiently gases like oxygen move from the lungs into the blood.
Together, these tests provide a comprehensive picture of lung function and can be used to monitor lung performance over time or assess the impact of environmental or occupational exposures.
EasyOne complete PFT and spirometry solutions
Discover the EasyOne solutions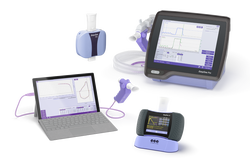
What is Diffusion Capacity (DLCO) testing?
Diffusion capacity (DLCO) is a clinically useful test that provides a quantitative measure of gas transfer from the lungs to the blood. It complements spirometry in evaluating and managing patients with cardiac and/or respiratory disease.
Why DLCO is important in lung disease diagnosis and management:
- Helps differentiate between obstructive and restrictive lung patterns.
- Detects early changes in gas exchange, even when spirometry appears normal.
- Assists in evaluating interstitial lung diseases, such as pulmonary fibrosis.
- Useful for monitoring disease progression or response to treatment.
DLCO testing for COPD
Learn more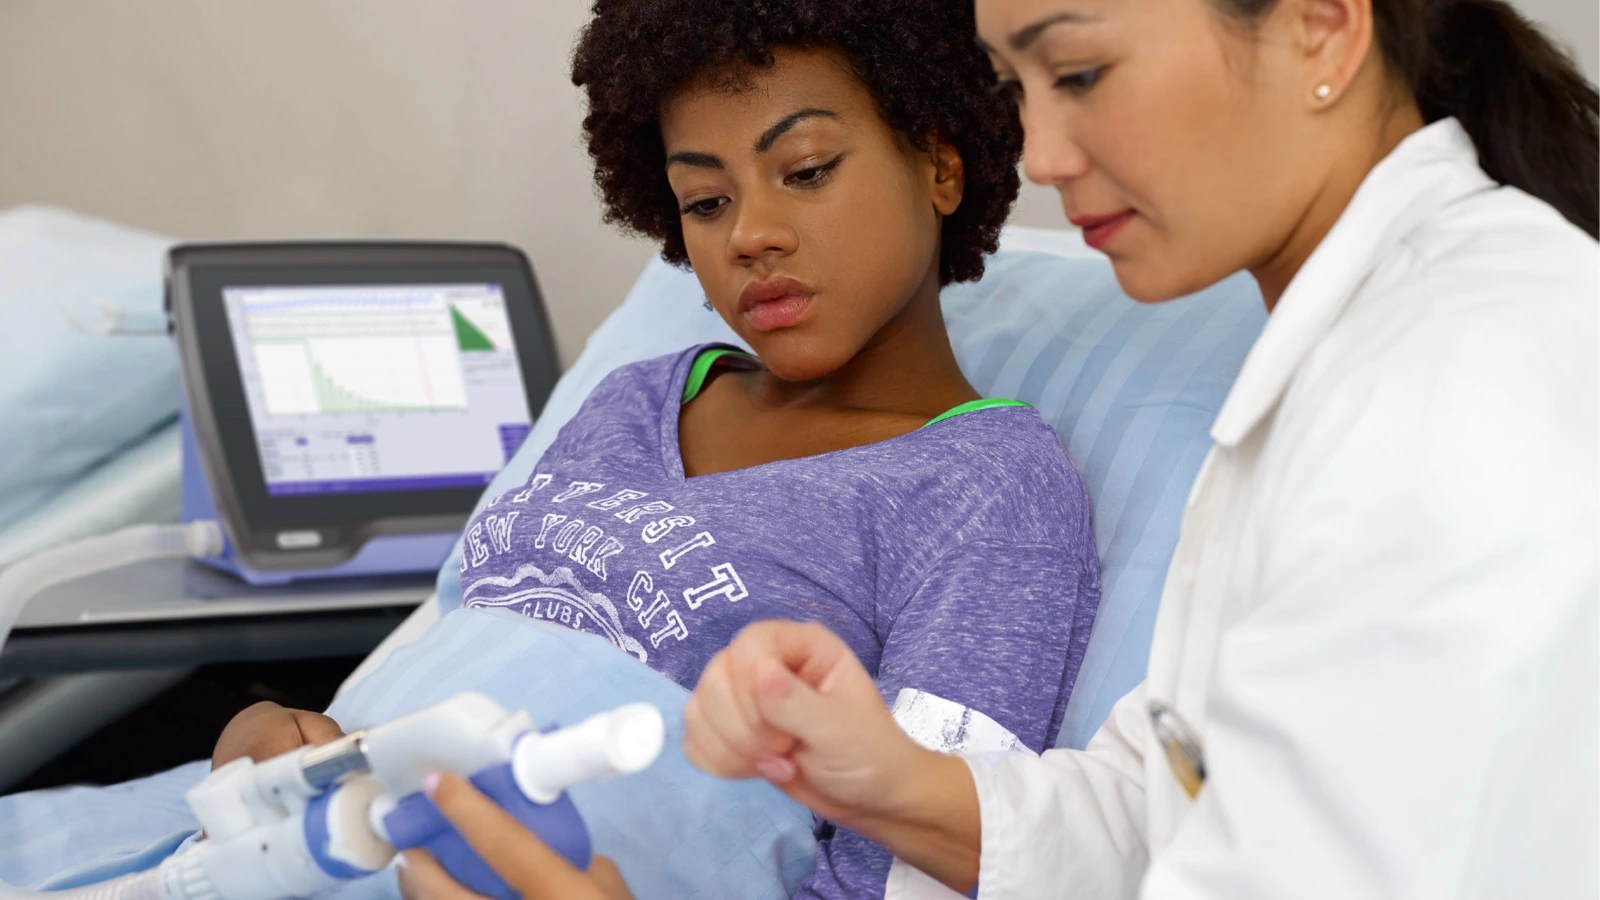
What is FEV1 in spirometry and what does it tell you?
FEV stands for Forced Expiratory Volume. The FEV1 parameter equates to the volume that is exhaled after one second. It is intended to measure the severity of an obstruction – with average FEV1 results measuring two to four liters. A lower FEV1 result equates to higher obstruction.
A simple guide to reading spirometry test results.
Get the tips from Buddy
What is FVC in spirometry and what does it tell you?
FVC stands for Forced Vital Capacity. FVC determines the total exhaled volume of air. FVC tells the spirometry tester how much air volume the patient can exhale. The FVC will fall when the patient can’t inhale deeply or can’t exhale completely. The average FVC result for an elderly man is about four liters (one gallon) of air. The intent of this parameter is to detect restriction.
A simple guide to reading spirometry test results.
Get the tips from Buddy.
What is spirometry used for?
Spirometry is used to diagnose and monitor lung diseases, assess pulmonary function, and support occupational health screenings. Spirometry helps healthcare providers to:
- Diagnose respiratory conditions like COPD and asthma
- Monitor disease progression and treatment effectiveness in patients with chronic lung conditions
- Evaluate lung function in workplace health programs, particularly for individuals exposed to dust, chemicals, or other respiratory hazards
By using a diagnostic spirometer, medical professionals can detect lung diseases early, track changes over time, and ensure workplace safety.
Ready to add spirometry testing to your practice?
Discover more now.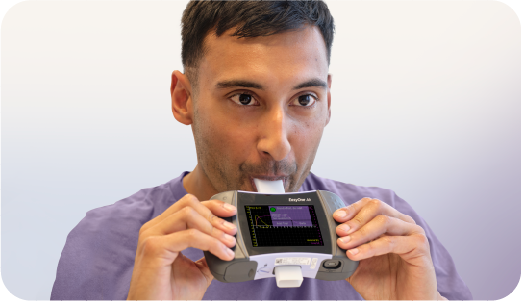
What is spirometry?
Spirometry is the primary method of assessing overall lung function. It works by measuring the volume of air that a patient can forcefully expel from the lungs after inhaling as much as possible. This non-invasive test is completed by medical professionals and is essential for diagnosing and monitoring respiratory conditions like COPD, asthma, and other lung diseases.
Using a diagnostic spirometer, a trained healthcare professional can assess lung health, detect early signs of disease, and guide treatment decisions.
Discover our advanced spirometry solutions here.
Book a demo today!
What is the difference between spirometry and a pulmonary function test (PFT)?
A spirometry test is a specific type of pulmonary function test. Spirometry measures the lungs volume (or how much) and flow (how quickly) the patient can move air into and out of their lungs. Spirometry will tell the tester if the patient has an obstruction, restriction, a mixed defect, or has normal lung flow.
Spirometry does NOT look at gas exchange and does not provide absolute lung volumes (RV, FRC, and TLC).
Diffusion capacity or transfer factor of the lung for carbon monoxide (CO) is known as a DLCO test. This measures the gas exchange and is used in conjunction with spirometry to provide a differential diagnosis. DLCO is also used to assess disease severity and is one of the best correlates of emphysema in COPD.
The final component that completes the full PFT exam is measuring absolute lung volume (RV, FRC, and TLC). This is completed by measuring body plethysmography, gas dilution, or nitrogen washout. Lung volumes are commonly used for the diagnosis of restriction. In obstructive lung disease, they are used to assess for hyperinflation. The changes in lung volumes can also be seen in a number of other clinical conditions.
Want to learn more about adding PFT and spirometry to your practice?
Get a live demo today!
What is the FEV1/FVC Ratio in spirometry and what does it tell you?
The FEV1/FVC ratio is typically expressed as a percentage (such as 75%). Nearly three-fourths of lung volume can normally be exhaled during the first second of the spirometry test. As such, the normal ratio falls between 65 to 85 percent. The range of normal FEV1/FVC ratio is determined by the patient’s age.
A simple guide to reading spirometry test results.
Get the tips from Buddy.
What will lung volumes show you?
Lung volumes are used to diagnose restrictive lung disease and to assess for hyperinflation in obstructive lung disease. With restrictive lung disease, TLC, VC, and RV may be decreased due to the inability of the lungs to expand properly.
The lungs are restricted from fully expanding and filling with air. In an obstructive disease such as COPD, patients may develop hyperinflation, which will result in a higher than normal TLC and RV. Conversely, IC will be decreased due to air trapping in the lungs.
Lung volume testing with the EasyOne Pro LAB provides fast, accurate, and fully automated measurements without the need for a body box. Its compact design and TrueFlow and TrueCheck technologies ensure reliable results for comprehensive lung assessment in most clinical settings.
EasyOne Pro LAB - Portable DLCO, MBW, Lung Volumes, LCI and Spirometry
Discover the benefits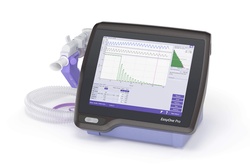
When would you use DLCO testing?
Diffusion capacity testing (DLCO) is best used to pinpoint the type of respiratory disease. It is completed after spirometry when an obstruction or lung volume issues are predetermined.
- Differentiating emphysema from obstructive bronchitis and chronic asthma
- Assessment of COPD
- Detection of pulmonary vascular disease
- Assessment of shortness of breath (SOB)
- Disability/Impairment evaluations for ILD or COPD
Which print options do I have with the EasyOne Air device
You can also synchronize the test to your EasyOne Connect on the PC and print from there.
We will not discuss this option here, we will focus on the options when using the standalone device
The print options need to be selected in the EasyOne Air menu first. This is how to do it.
- From the main menu, go to Tools > Settings > Print and select the Print format. In this view you can set up all printer related settings.
Let’s start with the most common option, which is external printing (Option 1). This involves a direct connection from the cradle to a printer.
- Ensure to connect the micro USB end of cable to the correct port on the cradle and connect the USB type B end to the printer.
- There is a large choice of printers on the market, each supporting different print formats or languages. In order to print successfully, the printer must support at least one of these formats. Direct PDF, HP PCL 3 Enhanced protocol, HP PCL3GUI
- A compatible printer list can be found on the ndd website.
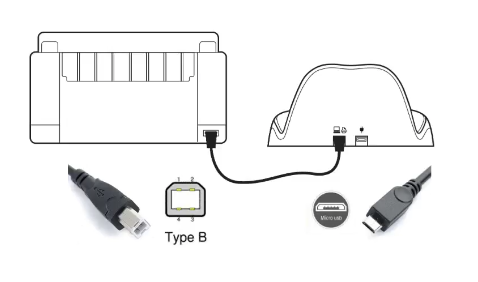
Another popular way to print results is via the integrated PDF printer (Option 2). This will create a PDF file in the EasyOne Air storage so that it can be moved to your PC and further utilized.
Whenever you print a test result, the file will be stored in the Exchange drive.
- To access this file, connect the device to a PC via the USB cradle. Usually a pop up window opens displaying the Exchange drive. If no pop up window appears, try opening the Exchange drive manually. For example, navigate in the Windows Explorer to this PC, then select EasyOne Air, then Exchange and select the desired PDF print out.
- The Exchange drive is the EasyOne Air internal storage and has only 15 MB of storage space. In there you find all PDF prints and also the log file.
The third method is to print the results via thermal printer (Option 3).
This method requires a special thermal printer that is compatible with the EasyOne Air.
Once the printer is connected, the results can be printed out immediately.
Learn more by watching the video below.
For more information see the AppNote.
